首页/文章/Android安全/企业安全-学习Kubernetes笔记——部署web站点环境(PHP+Nginx)/
企业安全-学习Kubernetes笔记——部署web站点环境(PHP+Nginx)
推荐 原创进入k8s集群主节点:10.10.30.201
准备工作
因为官方的php-fpm镜像没有MySQL插件,所以需要自己制作一个有插件的镜像
创建一个Dockerfile文件
|
1
2
3
4
5
6
7
8
9
10
|
FROM php:
7.4
-
fpm
RUN apt
-
get update && apt
-
get install
-
y \
libfreetype6
-
dev \
libjpeg62
-
turbo
-
dev \
libpng
-
dev \
&& docker
-
php
-
source extract \
&& docker
-
php
-
ext
-
configure gd
-
-
with
-
freetype
-
-
with
-
jpeg \
&& docker
-
php
-
ext
-
install
-
j$(nproc) gd \
&& docker
-
php
-
ext
-
install pdo_mysql \
&& docker
-
php
-
ext
-
install mysqli
|
生成镜像
|
1
|
docker build
-
t ai3666191
/
php
-
fpm:ameng .
|
因为K8S在创建容器的时候,是从docker hub上拉取镜像的,所以需要将镜像上传到docker仓库
|
1
2
3
4
5
6
7
8
9
10
11
12
13
14
15
16
17
18
19
20
21
22
23
|
[root@m1 yaml]
# docker login
Login with your Docker
ID
to push
and
pull images
from
Docker Hub. If you don't have a Docker
ID
, head over to https:
/
/
hub.docker.com to create one.
Username: ai3666191
Password:
WARNING! Your password will be stored unencrypted
in
/
root
/
.docker
/
config.json.
Configure a credential helper to remove this warning. See
https:
/
/
docs.docker.com
/
engine
/
reference
/
commandline
/
login
/
#credentials-store
Login Succeeded
[root@m1 yaml]
# docker push ai3666191/php-fpm:ameng
The push refers to repository [docker.io
/
ai3666191
/
php
-
fpm]
338933207958
: Pushed
5e65a6c61859
: Pushed
d78098596d78: Pushed
7c314756ee72
: Pushed
89982c6135ad
: Pushed
91fd2792fa74
: Pushed
08cc615b0242
: Pushed
44148371c697
: Pushed
797a7c0590e0
: Pushed
f60117696410: Pushed
ec4a38999118: Pushed
ameng: digest: sha256:
9767e38c793bdb77b96d2f9bdc921feb319e7b61504f3d2144628ebdd6a4b640
size:
2622
|
这样就可以从docker hub上拉取自己制作好的添加了mysql插件的php-fpm镜像了
搭建web环境
web环境为:php-fpm+nginx
使用2个镜像:ai3666191/php-fpm:ameng和nginx
编写web.yaml文件
|
1
2
3
4
5
6
7
8
9
10
11
12
13
14
15
16
17
18
19
20
21
22
23
24
25
26
27
28
29
30
31
32
33
34
35
36
37
38
39
40
41
42
43
44
45
46
47
48
49
50
51
52
53
54
55
56
57
58
59
60
61
62
63
64
65
66
67
68
69
70
71
72
73
74
75
76
77
78
79
80
81
82
83
84
85
86
87
88
89
90
91
92
93
94
95
96
97
98
99
100
101
102
103
104
105
106
107
108
109
110
111
112
113
114
115
116
117
118
119
120
121
122
123
124
125
126
127
128
129
130
131
132
133
134
135
136
137
138
139
140
141
142
143
144
145
146
147
148
149
150
151
152
153
154
155
156
157
158
|
kind: Service
# 对象类型
apiVersion: v1
# api 版本
metadata:
# 元数据
name: php
-
fpm
-
nginx
#Service 服务名
spec:
type
: NodePort
# 类型为nodeport
selector:
#标签选择器
app: php
-
fpm
-
nginx
ports:
#端口信息
-
port:
80
# 容器端口80
protocol: TCP
#tcp类型
targetPort:
80
# Service 将 nginx 容器的 80 端口暴露出来
-
-
-
kind: ConfigMap
# 对象类型
apiVersion: v1
# api 版本
metadata:
# 元数据
name: nginx
-
config
# 对象名称
data:
# key-value 数据集合
nginx.conf: |
# 将 nginx config 配置写入 ConfigMap 中,经典的 php-fpm 代理设置,这里就不再多说了
user nginx;
worker_processes auto;
error_log
/
var
/
log
/
nginx
/
error.log notice;
pid
/
var
/
run
/
nginx.pid;
events {
worker_connections
1024
;
}
http {
include
/
etc
/
nginx
/
mime.types;
default_type application
/
octet
-
stream;
log_format main
'$remote_addr - $remote_user [$time_local] "$request" '
'$status $body_bytes_sent "$http_referer" '
'"$http_user_agent" "$http_x_forwarded_for"'
;
access_log
/
var
/
log
/
nginx
/
access.log main;
sendfile on;
keepalive_timeout
65
;
server {
listen
80
default_server;
listen [::]:
80
default_server;
root
/
var
/
www
/
html;
index index.php index.html;
server_name _;
if
(
-
f $request_filename
/
index.html) {
rewrite (.
*
) $
1
/
index.html
break
;
}
if
(
-
f $request_filename
/
index.php) {
rewrite (.
*
) $
1
/
index.php;
}
if
(!
-
f $request_filename) {
rewrite (.
*
)
/
index.php;
}
location
/
{
try_files $uri $uri
/
=
404
;
}
location ~ \.php$ {
include fastcgi_params;
fastcgi_param REQUEST_METHOD $request_method;
fastcgi_param SCRIPT_FILENAME $document_root$fastcgi_script_name;
fastcgi_pass
127.0
.
0.1
:
9000
;
}
}
include
/
etc
/
nginx
/
conf.d
/
*
.conf;
}
-
-
-
kind: StatefulSet
# 对象类型
apiVersion: apps
/
v1
# api 版本
metadata:
# 元数据
name: php
-
fpm
-
nginx
# StatefulSet 对象名称
spec:
# StatefulSet 对象规约
selector:
# 选择器
matchLabels:
# 标签匹配
app: php
-
fpm
-
nginx
replicas:
3
# 副本数量
template:
# 模版
metadata:
# Pod 对象的元数据
labels:
# Pod 对象的标签
app: php
-
fpm
-
nginx
spec:
# Pod 对象规约
containers:
# 这里设置了两个容器
-
name: php
-
fpm
# 第一个容器名称
image: ai3666191
/
php
-
fpm:ameng
# 容器镜像
imagePullPolicy: IfNotPresent
#镜像拉取策略
livenessProbe:
# 存活探测
initialDelaySeconds:
5
# 容器启动后要等待多少秒后才启动存活和就绪探测器
periodSeconds:
10
# 每多少秒执行一次存活探测
tcpSocket:
# 监测tcp端口
port:
9000
#监测端口
readinessProbe:
# 就绪探测
initialDelaySeconds:
5
# 容器启动后要等待多少秒后才启动存活和就绪探测器
periodSeconds:
10
# 每多少秒执行一次存活探测
tcpSocket:
# 监测tcp端口
port:
9000
#监测端口
resources:
# 资源约束
requests:
# 最小限制
memory:
"64Mi"
# 内存最新64M
cpu:
"250m"
# CPU最大使用0.25核
limits:
# 最大限制
memory:
"128Mi"
# 内存最新128M
cpu:
"500m"
# CPU最大使用0.5核
ports:
-
containerPort:
9000
# php-fpm 端口
volumeMounts:
# 挂载数据卷
-
mountPath:
/
var
/
www
/
html
# 挂载两个容器共享的 volume
name: nginx
-
www
lifecycle:
# 生命周期
postStart:
# 当容器处于 postStart 阶段时,执行一下命令
exec
:
command: [
"/bin/sh"
,
"-c"
,
"echo startup..."
]
# 将 /app/index.php 复制到挂载的 volume
preStop:
exec
:
command:
-
sh
-
'-c'
-
sleep
5
&& kill
-
SIGQUIT
1
# 优雅退出
-
name: nginx
# 第二个容器名称
image: nginx
# 容器镜像
imagePullPolicy: IfNotPresent
livenessProbe:
# 存活探测
initialDelaySeconds:
5
# 容器启动后要等待多少秒后才启动存活和就绪探测器
periodSeconds:
10
# 每多少秒执行一次存活探测
httpGet:
# 以httpGet方式进行探测
path:
/
# 探测路径
port:
80
# 探测端口
readinessProbe:
# 就绪探测
initialDelaySeconds:
5
# 容器启动后要等待多少秒后才启动存活和就绪探测器
periodSeconds:
10
# 每多少秒执行一次存活探测
httpGet:
# 以httpGet方式进行探测
path:
/
# 探测路径
port:
80
# 探测端口
resources:
# 资源约束
requests:
# 最小限制
memory:
"64Mi"
# 内存最新64M
cpu:
"250m"
# CPU最大使用0.25核
limits:
# 最大限制
memory:
"128Mi"
# 内存最新128M
cpu:
"500m"
# CPU最大使用0.5核
ports:
-
containerPort:
80
# nginx 端口
volumeMounts:
# nginx 容器挂载了两个 volume,一个是与 php-fpm 容器共享的 volume,另外一个是配置了 nginx.conf 的 volume
-
mountPath:
/
var
/
www
/
html
# 挂载两个容器共享的 volume
name: nginx
-
www
-
mountPath:
/
etc
/
nginx
/
nginx.conf
# 挂载配置了 nginx.conf 的 volume
subPath: nginx.conf
name: nginx
-
config
lifecycle:
preStop:
exec
:
command:
-
sh
-
'-c'
-
sleep
5
&&
/
usr
/
sbin
/
nginx
-
s quit
# 优雅退出
volumes:
-
name: nginx
-
www
# 网站文件通过nfs挂载
nfs:
path:
/
k8s
/
html
/
server: nfs
-
name: nginx
-
config
configMap:
# configMap
name: nginx
-
config
|
执行yaml文件
|
1
|
kubectl
apply
-
f web.yaml
|
验证web环境
在nfs创建一个测试文件
|
1
2
3
4
5
6
|
[root@centosStream8 html]
# cd /k8s/html
[root@centosStream8 html]
# vi index.php
[root@centosStream8 html]
# cat index.php
<?php
phpinfo();
?>
|
查看pod运行状态及svc暴露端口
|
1
2
3
4
5
6
7
8
9
|
[root@m1 yaml]
# kubectl get pod -l app=php-fpm-nginx
NAME READY STATUS RESTARTS AGE
php
-
fpm
-
nginx
-
0
2
/
2
Running
0
52s
php
-
fpm
-
nginx
-
1
2
/
2
Running
0
49s
php
-
fpm
-
nginx
-
2
2
/
2
Running
0
45s
[root@m1 yaml]
# kubectl get configmaps | grep nginx
nginx
-
config
1
99s
[root@m1 yaml]
# kubectl get svc | grep nginx
php
-
fpm
-
nginx NodePort
10.96
.
124.114
<none>
80
:
31041
/
TCP
107s
|
出现PHP页面及web环境搭建成功。
上线站点
Jenkins将站点源码从gitlab拉取到NFS服务器挂载的站点路径并赋予源码文件相应权限后
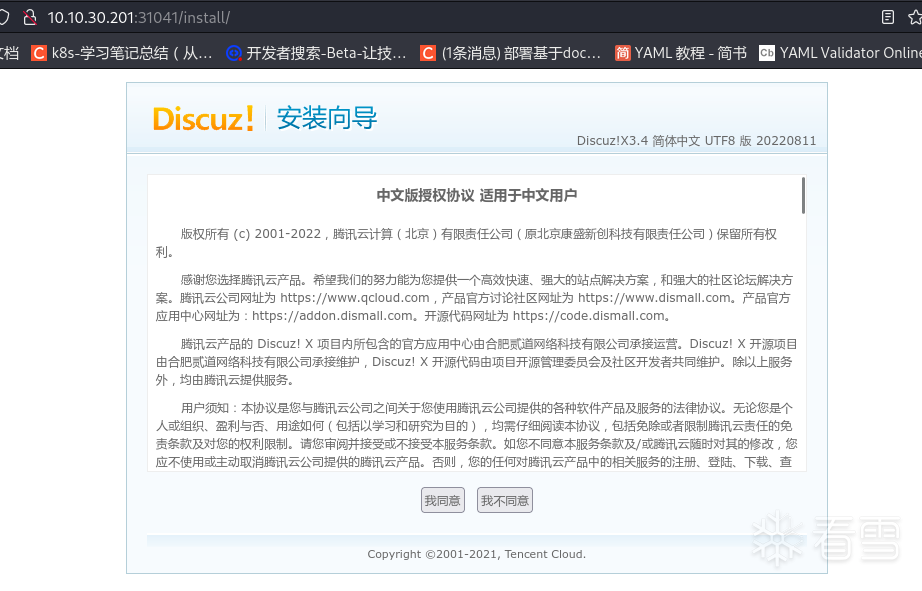
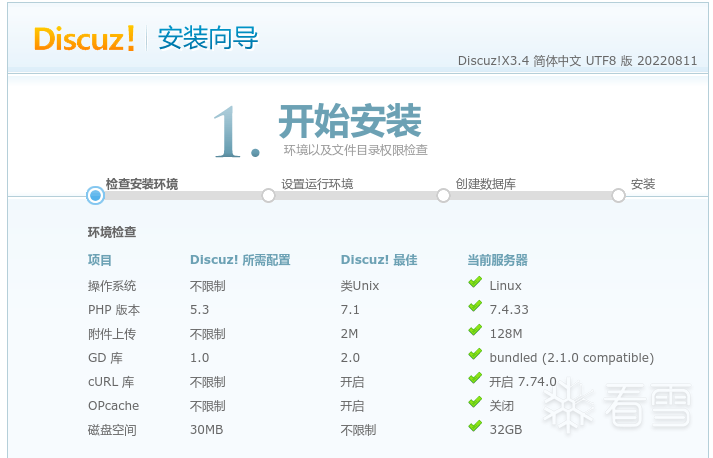
访问10.10.30.201:31041出现如下界面


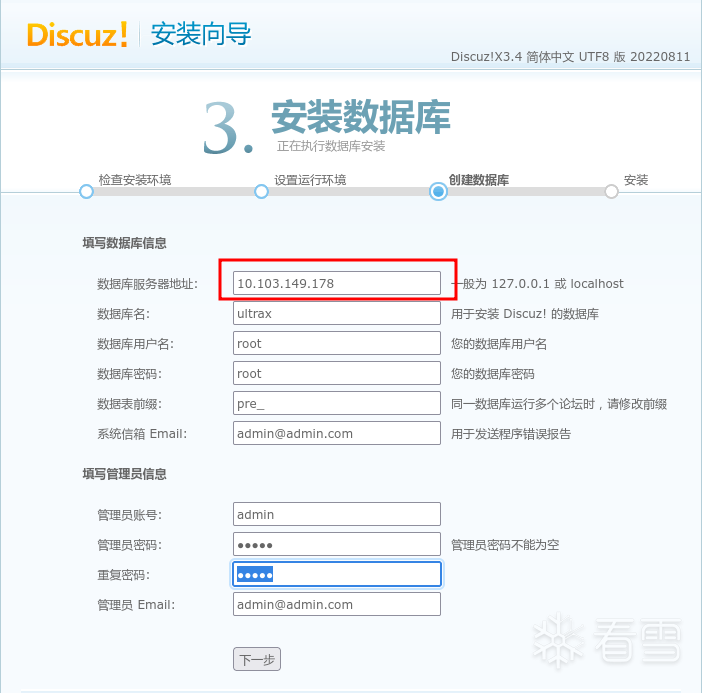
接下来配置数据库

因为同属集群内,Nginx与MySQL可以使用CLUSTER-IP相互通信,所以数据库服务地址填写集群内mysql的CLUSTER-IP如果是集群外的Nginx,地址应该填10.10.30.201:30336

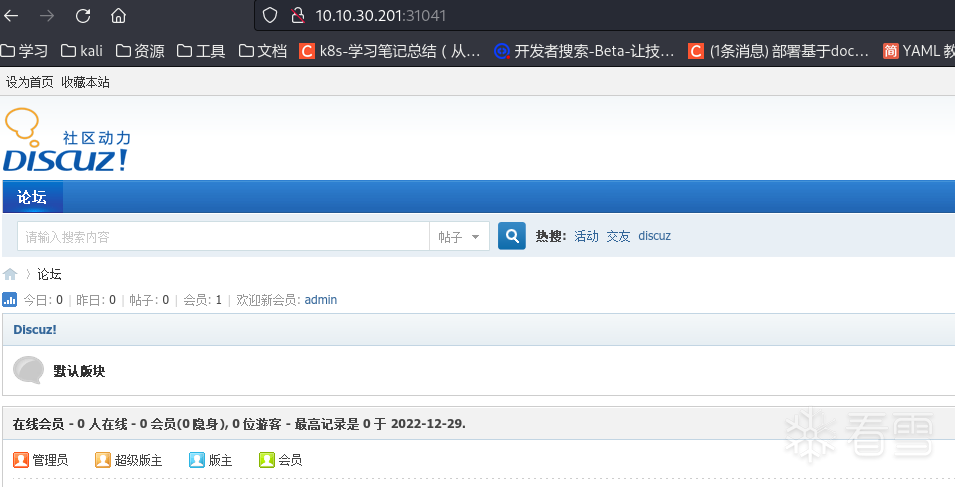
等进度条走完就可以访问站点了

更多【学习Kubernetes笔记——部署web站点环境(PHP+Nginx)】相关视频教程:www.yxfzedu.com
相关文章推荐
- 软件逆向-Wibu Codemeter 7.3学习笔记——AxProtector壳初探 - Android安全CTF对抗IOS安全
- 企业安全-学习Kubernetes笔记——暴露站点服务(Ingress) - Android安全CTF对抗IOS安全
- 企业安全-学习Kubernetes笔记——部署数据库站点(MySql) - Android安全CTF对抗IOS安全
- 企业安全-学习Kubernetes笔记——部署web站点环境(PHP+Nginx) - Android安全CTF对抗IOS安全
- 企业安全-学习Kubernetes笔记——安装NFS驱动 - Android安全CTF对抗IOS安全
- 企业安全-学习Kubernetes笔记——kubeadm安装Kubernetes - Android安全CTF对抗IOS安全
- 软件逆向-wibu软授权(四) - Android安全CTF对抗IOS安全
- 软件逆向-使用IDAPython开发复制RVA的插件 - Android安全CTF对抗IOS安全
- 2-wibu软授权(三) - Android安全CTF对抗IOS安全
- 软件逆向-wibu软授权(二) - Android安全CTF对抗IOS安全
- 软件逆向-wibu软授权(一) - Android安全CTF对抗IOS安全
- 软件逆向- PE格式:分析IatHook并实现 - Android安全CTF对抗IOS安全
- Android安全-安卓API自动化安全扫描 - Android安全CTF对抗IOS安全
- 二进制漏洞- Chrome v8 Issue 1307610漏洞及其利用分析 - Android安全CTF对抗IOS安全
- iOS安全-IOS 脱壳入坑经验分享 - Android安全CTF对抗IOS安全
- 二进制漏洞-Windows UAF 漏洞分析CVE-2014-4113 - Android安全CTF对抗IOS安全
- CTF对抗-lua 逆向学习 & RCTF picstore 还原代码块 - Android安全CTF对抗IOS安全
- Android安全-如何修改unity HybridCLR 热更dll - Android安全CTF对抗IOS安全
- 软件逆向-浅谈编译器对代码的优化 - Android安全CTF对抗IOS安全
- 二进制漏洞-年终CLFS漏洞汇总分析 - Android安全CTF对抗IOS安全
记录自己的技术轨迹
文章规则:
1):文章标题请尽量与文章内容相符
2):严禁色情、血腥、暴力
3):严禁发布任何形式的广告贴
4):严禁发表关于中国的政治类话题
5):严格遵守中国互联网法律法规
6):有侵权,疑问可发邮件至service@yxfzedu.com
近期原创 更多
- spring-Java之SpringCloud Alibaba【八】【Spring Cloud微服务Gateway整合sentinel限流】
- 云原生-云原生周刊:Gateway API 1.0.0 发布 | 2023.11.6
- java-Ruby语言和VCR库编写代码示例
- spring-C#开发的OpenRA游戏之世界存在的属性CombatDebugOverlay(3)
- 编程技术-Linux文件系统
- 电脑-电脑硬盘数据恢复哪个好?值得考虑的 8 个硬盘恢复软件解决方案
- jvm-内存管理
- 算法-吴恩达《机器学习》7-1->7-4:过拟合问题、代价函数、线性回归的正则化、正则化的逻辑回归模型
- 前端-vue项目js原生属性IntersectionObserver实现图片懒加载
- 编程技术-Python标准库有哪些